If you have ever wanted to do some debugging in Boomi, well, it is a bit of a challenge if you are used to available when doing traditional programming in any language.
This Groovy script will dump the following information to the App Log.
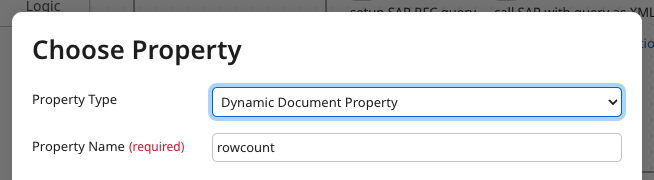
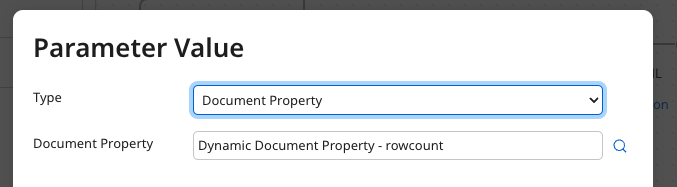
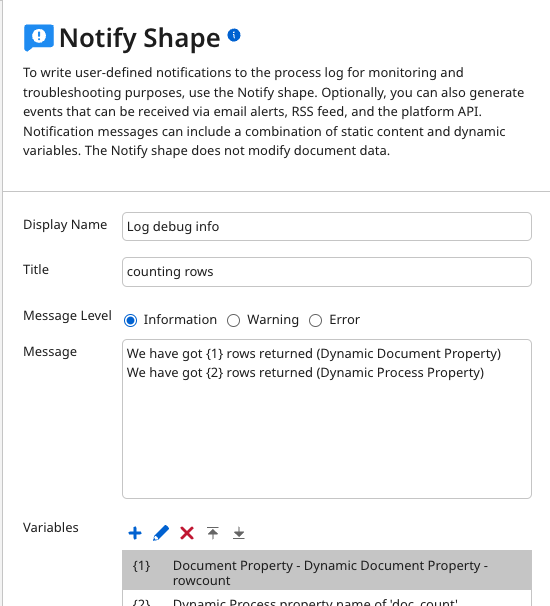
- DDP: Document Properties
- DPP: Dynamic Process Properties
- Document content
The following GROOVY script will print out that
And can be injected anywhere in your flow.
|
1 2 3 4 5 6 7 8 9 10 11 12 13 14 15 16 17 18 19 20 21 22 23 24 25 26 27 28 29 30 31 32 33 34 35 36 37 38 39 40 41 42 43 44 45 46 47 48 49 50 51 52 53 54 55 56 57 58 59 60 61 62 63 64 65 66 |
package com.tsoft.groovy import com.boomi.execution.ExecutionManager import com.boomi.execution.ExecutionUtil import java.util.logging.Logger import java.util.stream.Collectors // // This script will log the properties of ALL the Documents // to the app log // // NEWLINE = System.getProperty("line.separator"); processName = ExecutionManager.getCurrent().getProcessName(); baseLogger = ExecutionUtil.getBaseLogger(); baseLogger.info("Process Name " + processName + NEWLINE) execProps = ExecutionManager.getCurrent().getProperties(); baseLogger.info("PROCESS PROPERTIES: " + NEWLINE); formatProps(execProps, baseLogger); baseLogger.info("Number of documents : " + dataContext.getDataCount() + NEWLINE); for (int i = 0; i < dataContext.getDataCount(); i++) { InputStream is = dataContext.getStream(i); Properties props = dataContext.getProperties(i); // Copy the data from the InputStream to the ByteArrayOutputStream def byteArrayOutputStream = new ByteArrayOutputStream() is.eachByte { byte b -> byteArrayOutputStream.write(b) } byte[] byteArray = byteArrayOutputStream.toByteArray() def byteArrayInputStream = new ByteArrayInputStream(byteArray) byte[] bytes = byteArrayOutputStream.toByteArray() String doc = new String(bytes, "UTF-8") baseLogger.info("Document Properties for Document #" + i + NEWLINE); formatProps(props,baseLogger); baseLogger.info("DOCUMENT #" + i + NEWLINE); if (doc.trim().isEmpty()) { baseLogger.info("The Document is EMPTY !"); } else { baseLogger.info(doc); } // Put back the doc/message again dataContext.storeStream(byteArrayInputStream, props); } baseLogger.info("Script Done!") def formatProps(props, baseLogger) { for (k in props.keySet()) { value = props.get(k) size = 0 if( value == null ) { value = "null" } else { size = value.size() } baseLogger.info( k + " = '" + value + "' (len=" + size + ")" + NEWLINE ); } } |
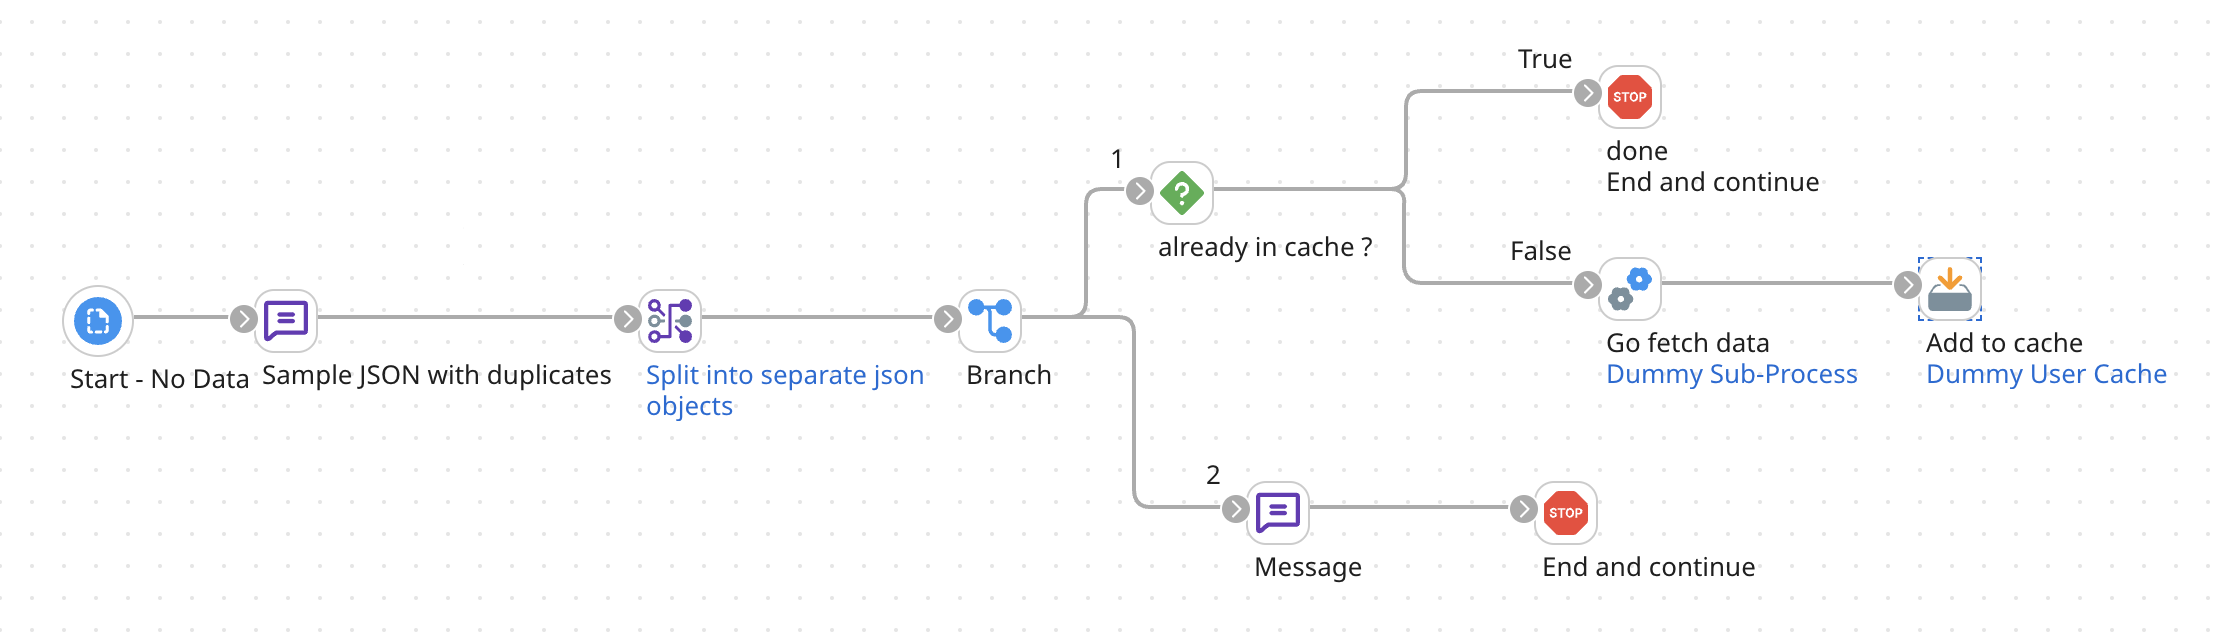
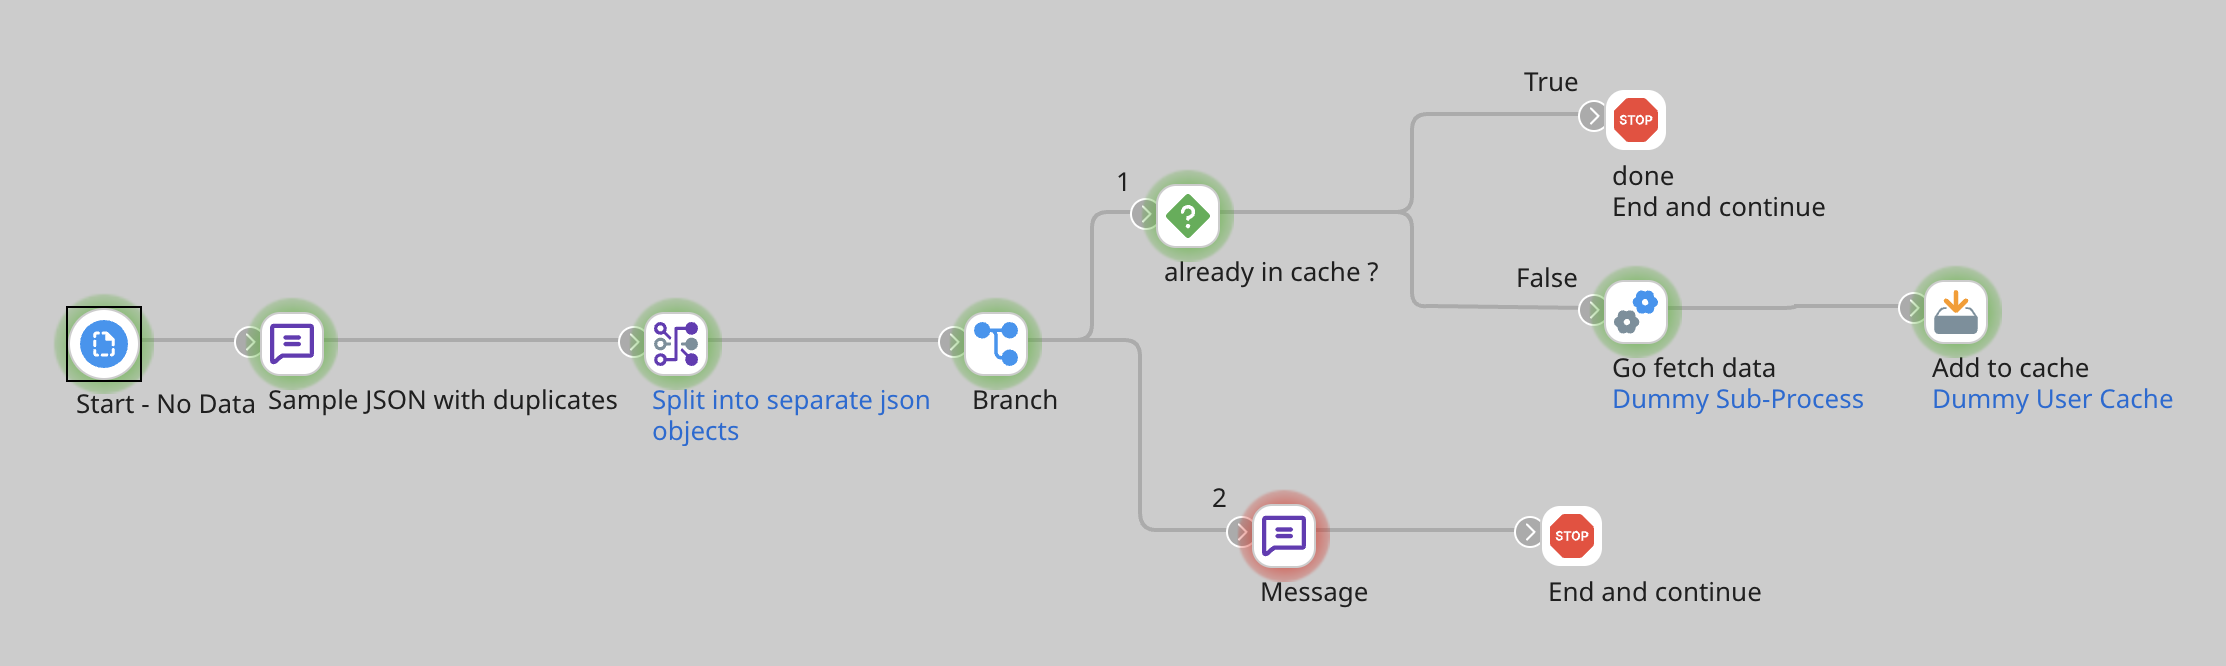
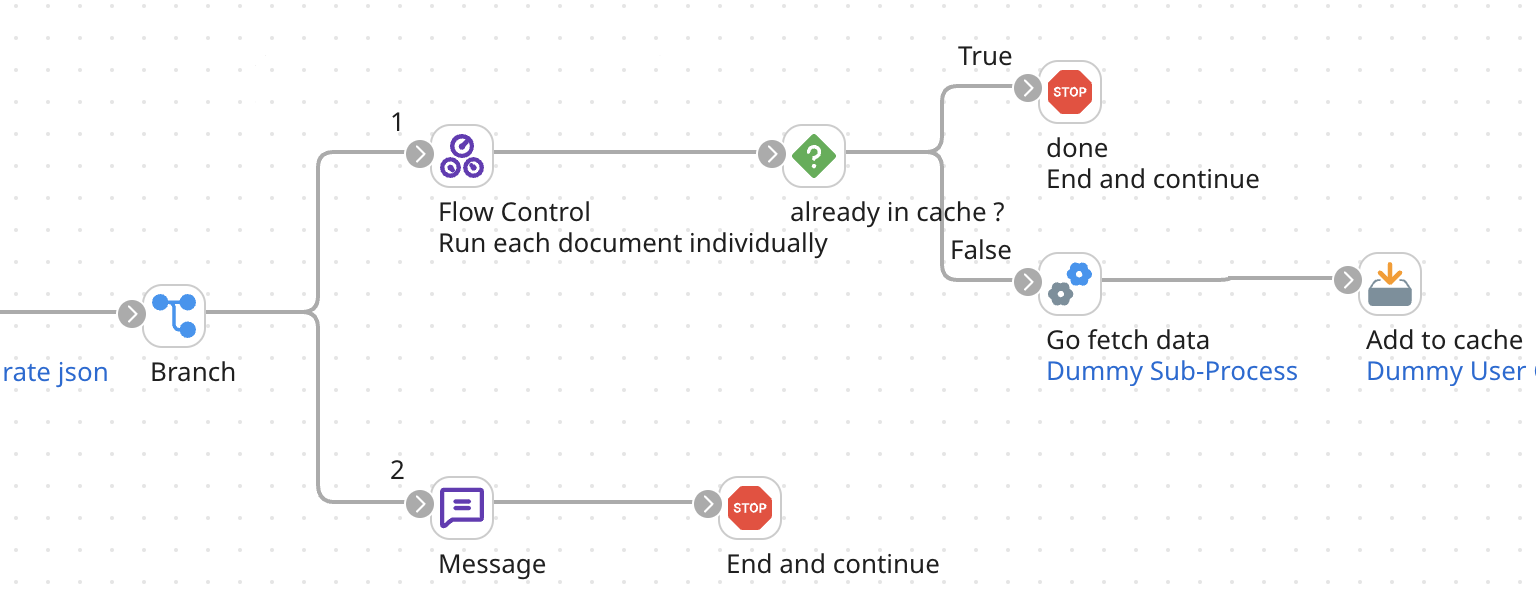
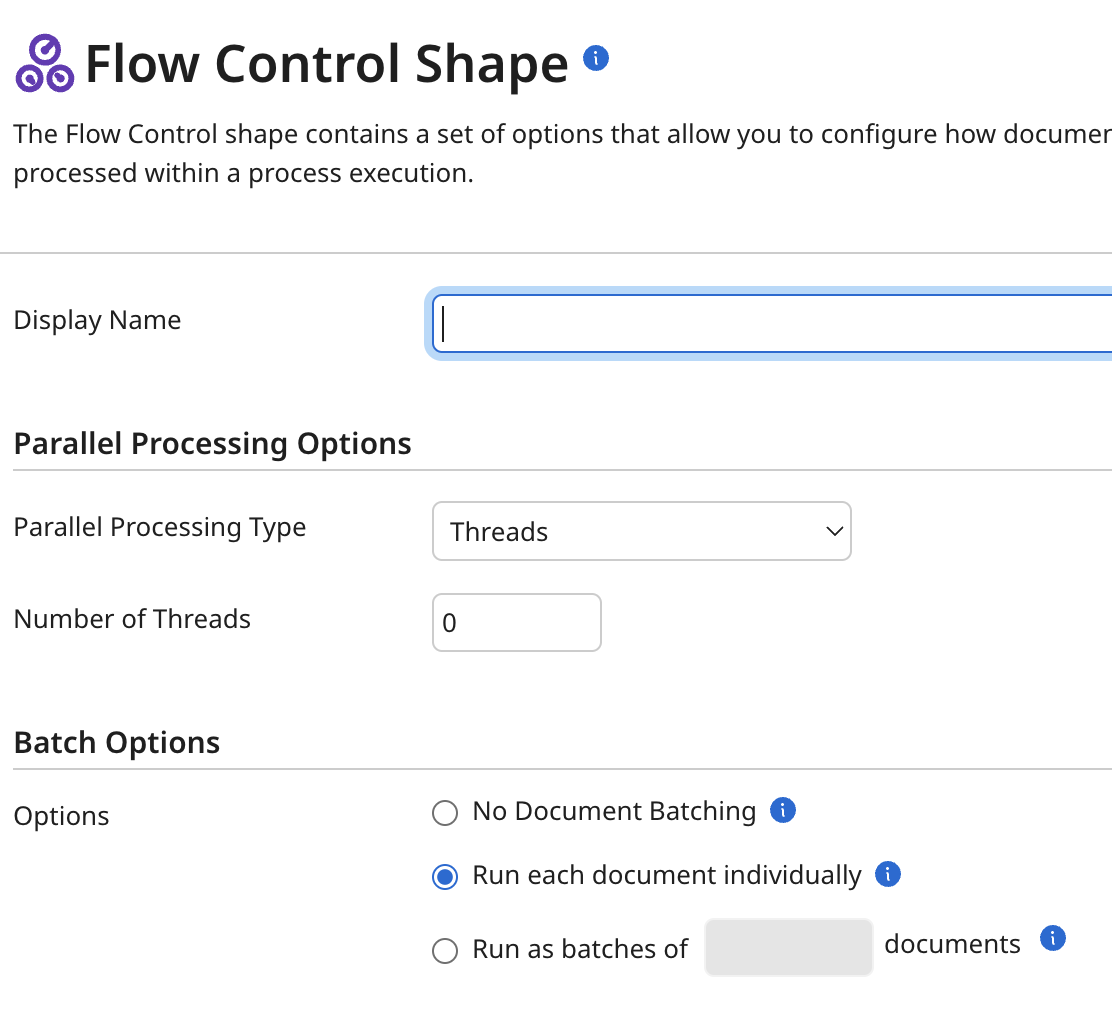
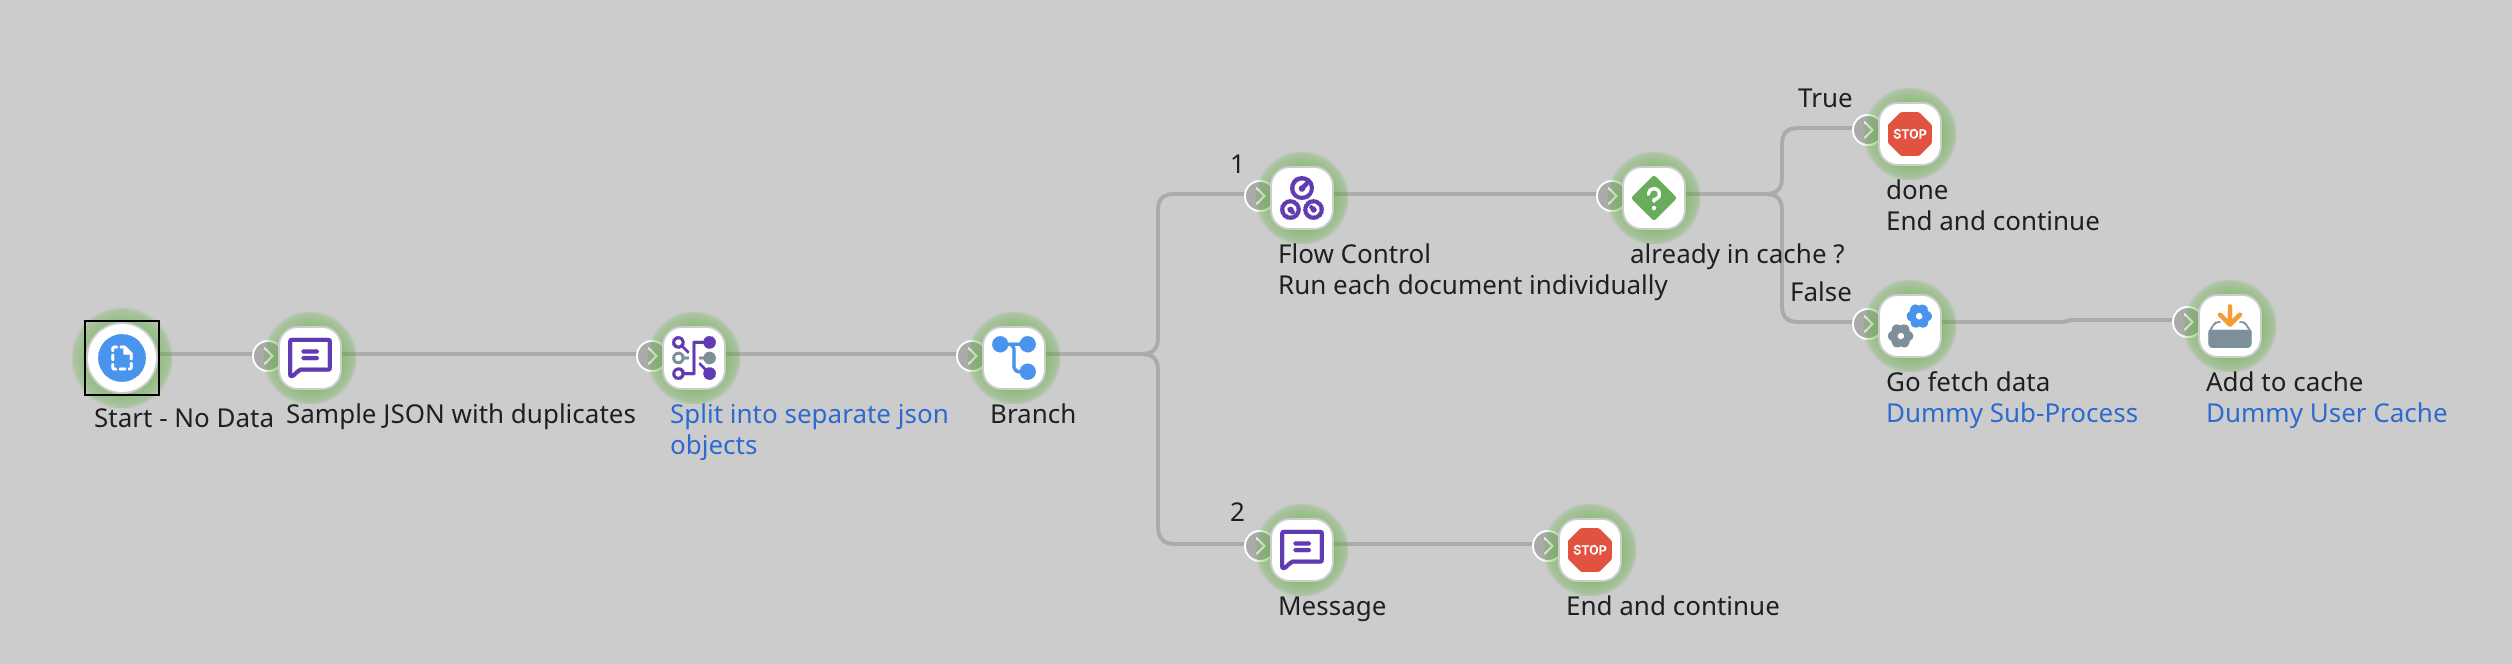
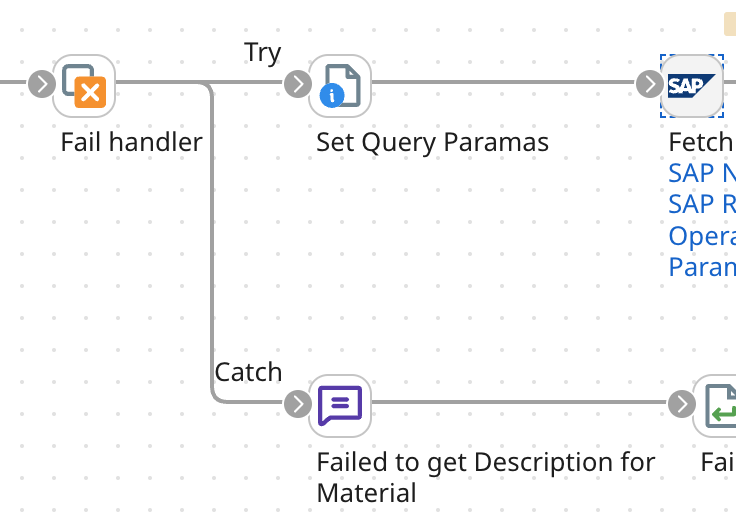
Just add a “Data Process” shape and include the script, and inject it anywhere you like

When running, the debugging info will be found in the App Log, see example below