All posts by tobias

Monitor Energy with Shelly 3em, Raspberry Pi, Node Red, PostgreSQL, MQTT(Mosquito), …

Trying to write down some of the things I did to get this working

What Shelly 3em publishes

You can see all the topics of the mqtt broker by doing like this :
mosquitto_sub -d -v -t “#”
The ‘#’ means ALL topics, and by doing this I will get something like this :

Install Node Red

bash <(curl -sL https://raw.githubusercontent.com/node-red/linux-installers/master/deb/update-nodejs-and-nodered)

Install Mosquito

sudo apt update && sudo apt upgrade
sudo apt install -y mosquitto mosquitto-clients
sudo systemctl enable mosquitto.service
mosquitto -v

show all what comes in regardless of topic (show all topics,, kind of…)
mosquitto_sub -d -v -t “#”

cat /etc/mosquitto/mosquitto.conf
sudo vi /etc/mosquitto/mosquitto.conf


sudo systemctl restart mosquitto

Install PostgreSQL

(*) Do not forget to setup remote access to postgresql

Create database, schema and table

Node Red

Insert data into PostgreSQL

Useful docker commands

Download Docker image

docker pull python

Start up Docker image with just a bash shell as entrypoint

docker run -it –rm –name python python /bin/bash

now you should see something like this :

root@ba17e57ff5e8:/# 
root@ba17e57ff5e8:/# python -V
Python 3.10.4

Attach to a running docker container

docker exec -it <container-name> bash

Exposing PORT to the host outside the docker

docker run -p 90:80 -it –rm –name python python /bin/bash

Port 80 is the port used INSIDE the Docker
Port 90 is the port on the host (so OUTSIDE)

This means that on the laptop I would do

curl http://localhost:90

and reach the webserver running inside the docker listening on port 80.

Java & JSON : How to serialize NULL

So how do you serialize NULL ?
NULL would typically mean that the attribute is omitted from the json, but what if you WANT the NULL to be there, to symbolize an attribute that should be REMOVED.


    @AllArgsConstructor
    @NoArgsConstructor
    @Getter
    @Setter
    @ToString
    public static class Product {
        public String model;
        public String color;
        public String shirtSize;
    }

    @Test
    void howToSerializeNULL() {
        Product bossShirt = new Product("super slim", "red", "xl");
        System.out.println("Product : " + JSONUtils.stringify(bossShirt));
        bossShirt.setShirtSize(null);
        System.out.println("Product : " + JSONUtils.stringify(bossShirt));
        Map<String, Object> obj = new HashMap<>();
        obj.put("model", "super slim");
        obj.put("color", "red");
        obj.put("shirtSize", JSONObject.NULL);
        System.out.println("Product : " + JSONUtils.stringify(obj));
        GsonBuilder builder = new GsonBuilder();
        builder.serializeNulls();
        Gson gson = builder.create();
        System.out.println("Product : " + gson.toJson(obj));
        System.out.println("Product : " + gson.toJson(bossShirt));
    }

Mockito and JUnit 5

The purpose of this post is simply to give a hint on how to use Mockito, Spy, and JUnit 5.

package se.tkartor.microservice.tols;

import org.junit.jupiter.api.Assertions;
import org.junit.jupiter.api.Test;
import org.junit.jupiter.api.extension.ExtendWith;
import org.mockito.Mock;
import org.mockito.Mockito;
import org.mockito.junit.jupiter.MockitoExtension;

@ExtendWith(MockitoExtension.class)
public class MockTest {

    @Mock
    Car mockCarTWO;

    @Test
    public void noMockJustAssertTest() {
        Car car = new Car("red", 250, new Wheels(19));
        Assertions.assertEquals(250, car.maxSpeed);
    }

    /**
     * The purpose of this test is to show that a Mock can be created
     * using the API and does not have to be created using the @Mock annotation
     * NOTE! that creating a mock out of a class, means that it still serves
     * the interface/API of the original class, but NONE of the methods
     * will do anything nor will the return anything
     * The mock-instance is simply an empty shell, and hence the last
     * commented-out code/line is not possible, since it will return NULL
     */
    @Test
    public void mockitoAPItest() {
        Car mockCar = Mockito.mock(Car.class);
        mockCar.setColor("blue");
        mockCar.setMaxSpeed(100);
        Mockito.verify(mockCar).setColor("blue");
        // Assertions.assertEquals("blue" , mockCar.getColor());
        Assertions.assertNull( mockCar.getColor() );
    }

    /**
     * Based on the fact that a mocked class is an empty shell
     * it is possible to also attach a.k.a spy on a instance
     * and carry out mocking this way, this is useful when you have
     * and instance that does everything right, except you need to
     * see what happens when you demand it to return a certain value
     * under certain cirumstances. The example below hopefully
     * explains this :-)
     */
    @Test
    public void spyTest() {
        Car mockCar = Mockito.spy(new Car("red", 90, new Wheels(19)));
        mockCar.setColor("blue");
        mockCar.setMaxSpeed(100);
        Mockito.verify(mockCar).setColor("blue");
        Assertions.assertEquals("blue", mockCar.getColor());
    }

    /**
     * Nothing new, as explained above
     * the instance of the mocked class will be an empty shell
     */
    @Test
    public void mockitoAPITest() {
        Car mockCar = Mockito.mock(Car.class);
        Mockito.when(mockCar.getColor()).thenReturn("green");
        mockCar.setColor("blue");
        mockCar.setMaxSpeed(100);
        mockCar.setWheels(new Wheels(19)); // this is possible since the api signature is there and hence the mock
        // allows it to be called, but it does not do anything
        Mockito.verify(mockCar).setColor("blue");
        Assertions.assertEquals("green", mockCar.getColor());
        Assertions.assertNull(mockCar.getWheels()); // This is null, since there is no mock for it
    }

    /**
     * The purpose with this test was simply
     * to use the @Mock annotation insead of the
     * mockito API, a somewhat lightweight / easy to read approach
     */
    @Test
    public void mockitoAnnotationTest() {
        Mockito.when(mockCarTWO.getColor()).thenReturn("green");
        Assertions.assertEquals("green", mockCarTWO.getColor());
    }

    public static class Wheels {
        private int size;

        public Wheels(int size) {
            this.size = size;
        }

        public int getSize() {
            return size;
        }

        public void setSize(int size) {
            this.size = size;
        }
    }

    public static class Car {
        private String color;
        private long maxSpeed;
        private Wheels wheels;

        public Car(String color, long maxSpeed, Wheels wheels) {
            this.color = color;
            this.maxSpeed = maxSpeed;
            this.wheels = wheels;
        }

        public int wheelSize() {
            return wheels.getSize();
        }

        public String getColor() {
            return color;
        }

        public void setColor(String color) {
            this.color = color;
        }

        public long getMaxSpeed() {
            return maxSpeed;
        }

        public void setMaxSpeed(long maxSpeed) {
            this.maxSpeed = maxSpeed;
        }

        public Wheels getWheels() {
            return wheels;
        }

        public void setWheels(Wheels wheels) {
            this.wheels = wheels;
        }
    }
}

SQL Scratch

These are just scratches/notes for my work with Prestashop

select id_product, reference from ps_product where reference like '9254050' limit 10;
Uppercase first letter only on string, and lowercase the others (remove any spaces infront or at the end)
select name, concat(upper(left(name,1)),lower(substring(name,2,length(name)))) from ps_product_lang where id_product = 22285 limit 10;
update ps_product_lang set name = concat(upper(left(trim(name),1)),lower(substring(trim(name),2,length(trim(name)))));

Create copy of table / duplicate table (select into kind of)

create table tobias_ps_product_lang_20211107 as select * from ps_product_lang;
create table tobias_ps_product_shop_20220113 as select id_product, id_shop, price, wholesale_price from ps_product_shop;
select id_product, id_shop, price, wholesale_price from ps_product_shop;

Functions as Arguments Java vs Scala, Game Set Match Scala Wins!

This is how you would create a function that takes a function as argument in Java

import java.util.function.Function;

class Scratch {

    public static void doCallFunc(int num, Function<Integer,String> fn) {
        System.out.println( "Result : "+fn.apply( num ) );
    }

    public static void main(String[] args) {
        Function<Integer,String> myFunc = num -> "Value = " + num;
        System.out.println( myFunc.apply( 7 ) );        
    }
}

The Function<A,B> myFunc = num -> “Value = ” + num;
Here :
A = the type of the first argument, in this example an interger
B = the type of the result/returned value, in this exampel a String

And for multiple parameters you need to create an interface like this

import java.util.function.Function;


@FunctionalInterface
interface TwoParamFunction<A,B,C> {
    public C apply(A a, B b);
}

class Scratch {

    public static void doCallFunc2(int num, TwoParamFunction<Integer,String,String> fn) {
        System.out.println( "Result : "+fn.apply( num, "Value" ) );
    }

    public static void main(String[] args) {
        TwoParamFunction<Integer,String,String> myFunc2 = (num,str) -> str + " : " + num;
        doCallFunc2( 7, myFunc2 );

    }
}

Now with TWO (2) parameters instead, it looks looks alot more complicated.
TwoParamFunction<A,B,C>
A = is the type of the first parameter
B = is the type of the second parameter
C = is the type of the resule/returned value

If we look at Scala the code looks alot simpler and much more intuitive

def myFunc( num:Int ):String = {
 "Value = " + num
}

def doCallFunc( num:Int, fn:(Int)=>String ):Unit = {
 println("Result :"+fn(num))
}

doCallFunc(123,myFunc)

here the definition of the function
fn:(Int)=>String
clearly spells out that the first argument is an Int and the return type is a String.

And if we in Scala would have 2 or more arguments you have probably already guessed it

def myFunc2( num:Int, str:String ):String = {
  str + num
}

def doCallFunc2( num:Int, fn:(Int,String)=>String ):Unit = {
  println("Result :"+fn(num,"Value = "))
}

doCallFunc2( 123, myFunc2 )

For functions as arguments/parameters example above, then Scala wins all week !

Over and out !

Apache Cassandra Secondary Indices

How are Secondary Indices really stored ?

This is based on the article from Datastax found here; https://www.datastax.com/blog/2016/04/cassandra-native-secondary-index-deep-dive

Let’s just create a simple table

Or visualized as a table :

ColumnTypeKey
idintPrimary Key
citytext
nametext

If we then create an index like this

Then this will result in just “normal” table, just hidden , and here the column we created the index for becomes the Partition Key, and the original table Partition Key becomes the clustering key

ColumnTypeKey
citytextPrimary Key
idintClustering Key

With some data it would be like this for the “customer” table.

IdNameCity
1Italia PizzeriaKalmar
2Thai SilkKalmar
3Royal ThaiStockholm
4Indian CornerMalmö

And the index which then is a “table” would thus be like this

CityId
Kalmar1
Kalmar2
Stockholm3
Malmö4

When a cluster is used, the index then the data of the source table is distributed over the nodes, using the murmor3 algorithm. Now the index table is also distributed, BUT together on the same node with the data of the source table.

Print stacktraces for all threads on shutdown

If your microservice stops responding from time to time, and they only way out is to kill it with SIGINT or SIGTERM then adding a shutdown hook might be the way to go. Do note that this will not work if you kill the process with SIGKILL (-9), cause that will result in an unclean shutdown.

Some of this code is heavily influenced by Print all of the thread’s information and stack traces : Exception « Development « Java Tutorial. But has been translated into Scala, and cleaned up a little.

The output would look something like this


Apache Zeppelin, with Spark and Cassandra, the perfect tool

Zeppelin has become one of my favourite tools in my toolbox. I am heavily designing stuff for Cassandra and in Scala, and even though I love Cassandra there are times when things just gets so complicated with the CQL command line, and creating a small project in IntelliJ just seems like too much hazel. Then using Zeppelin to try out is just perfect. So this page is a How-To with some useful Cookbook recipes.

Setting Up Zeppelin

I use Docker where things are so much easier, and I pick v0.8.0 cause I never got 0.8.2 to work for some reason.

Download and Start Cassandra


Download and Start Zeppelin

Download Zeppelin image

Start Zeppelin on port 8080

-p hp:cp
hp = Host Port, the port on your local machine
cp = Container Port, the port inside the docker which is what Zeppelin is exposing

Go to localhost:8080 in your web browser and you should see something like this

Setup Zeppelin

Find out the IP address of Cassandra in you Docker network, as you can see of the inspect, the IP address is 172.17.0.3.


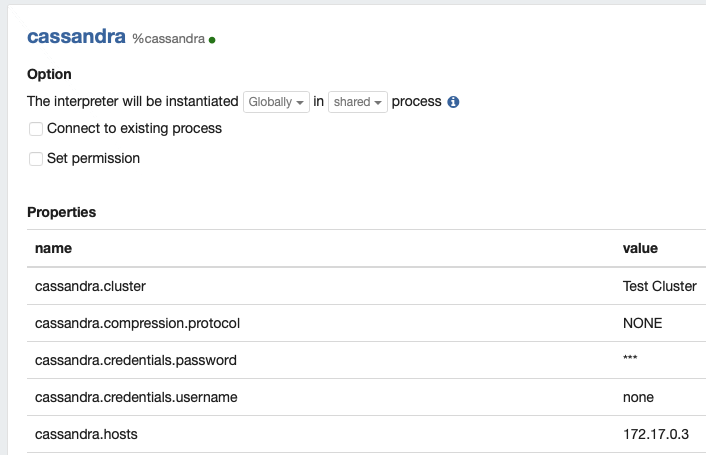
Set up IP address for Cassandra in the Spark Interpreter

Go to the section on “Spark”

Now add a row that says

Now also edit the Dependencies

You can do this in many ways, either you specify the MAVEN repo with version OR you download the JAR file(s) to disk and copy them into the Docker. I had to do the latter due to some issue with my network.

You need these two libraries :

Simply click on the JAR file and download the file, then copy it into the docker with

Setup IP address for Cassandra in Cassandra Interpreter

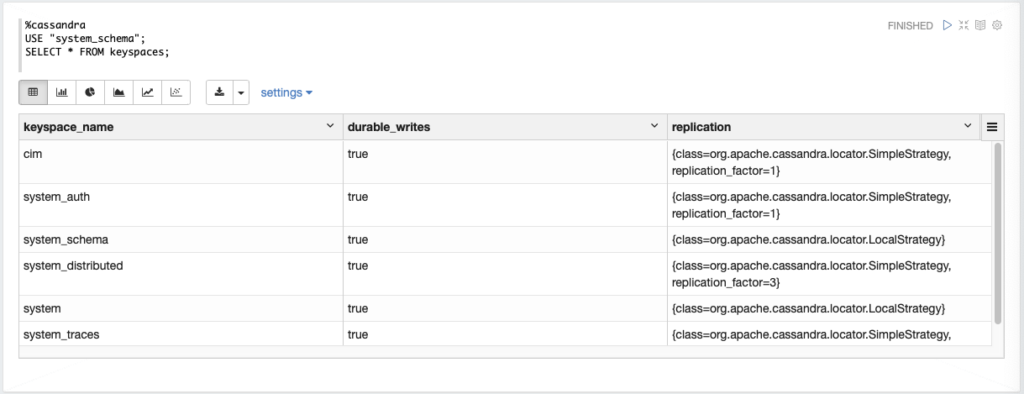
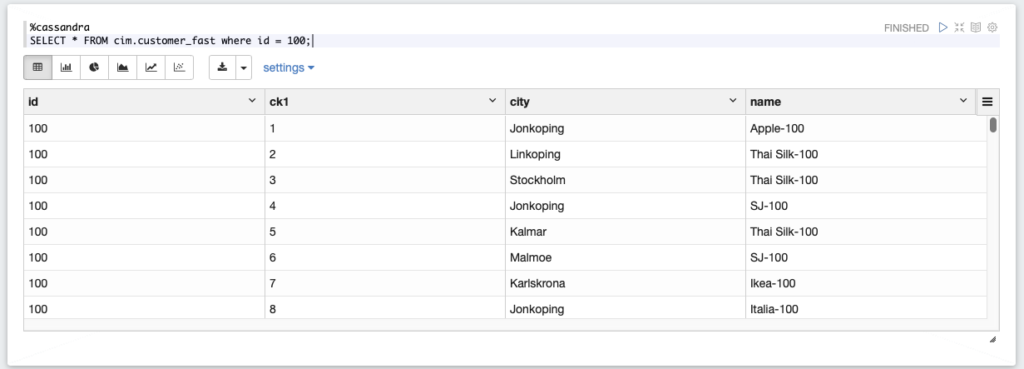
Create your first Notebook